The advanced features in forms4health use XPath (XML Path Language) queries.
For a quick reference list of commonly used XPath expressions in forms4health see the FAQ guide.
On this page, you can find out more about:
Calculated Value
Use for: performing calculations and generating hidden or visible value outputs within your building block
For example:
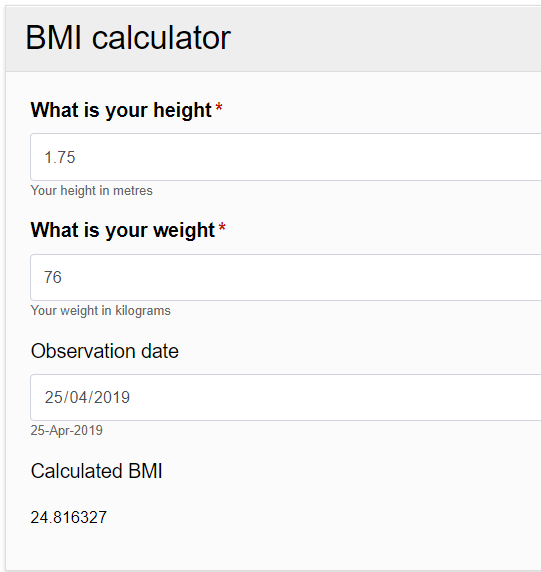
The following steps show how to create a numeric value calculation with an example using height and weight to output a BMI score. Calculated values can also be used to produce text (string) outputs, and can be developed in numerous ways depending on the complexity of the calculation to be performed.
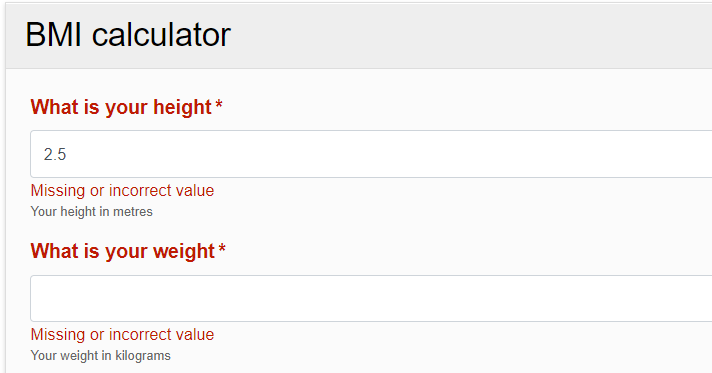
- Input the required data fields to support the calculation, in this case, height and weight (number fields). In this example, further constraints should be set to assign acceptable height and weight parameters to perform the calculation. See more information about this in the validation section above. The height and weight data fields should be set to metric measurements with height input in metres (m) and weight in kilograms (kg). Acceptable limits of (low and high) measurements should be set to ensure that the calculation is performed correctly.
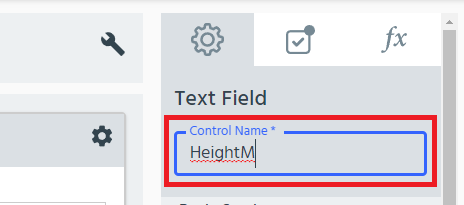
- Name the height and weight controls so that they can be easily referred to in the calculation e.g. “WeightKG” and “HeightM”. Use the Control Settings (cog) icon at the right hand side of each data field.
- Add a ‘calculated value’ data field where the value will be presented - in this case a number field called ‘calculated BMI’.
- Go to the Control Settings (cog) icon and the Formulas tab. The calculation takes the form: weight divided by height squared. To input this formula in XPath it takes the form:
- $control-name div (control-name * control-name) OR
- $WeightKG div (HeightM * HeightM)
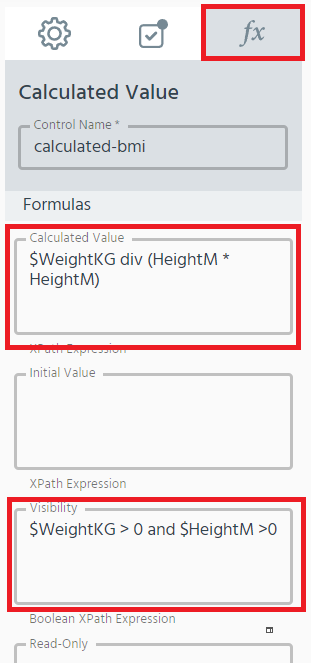
- To make the calculation visble when a numeric value is input into both of the height and weight fields, use the following formula (as shown above) in the Visibility text box in the Formulas tab:
- $WeightKG > 0 and $HeightM > 0
For more information on visibility, click here.
Skip Logic
Use for: presenting only relevant data fields to users, skip logic enables non-relevant items to be skipped within a form
For example:
The following steps show two ways to use skip logic, using both binary choice (Yes/No Answer) and select one from multiple options (Dropdown Menu) data fields.
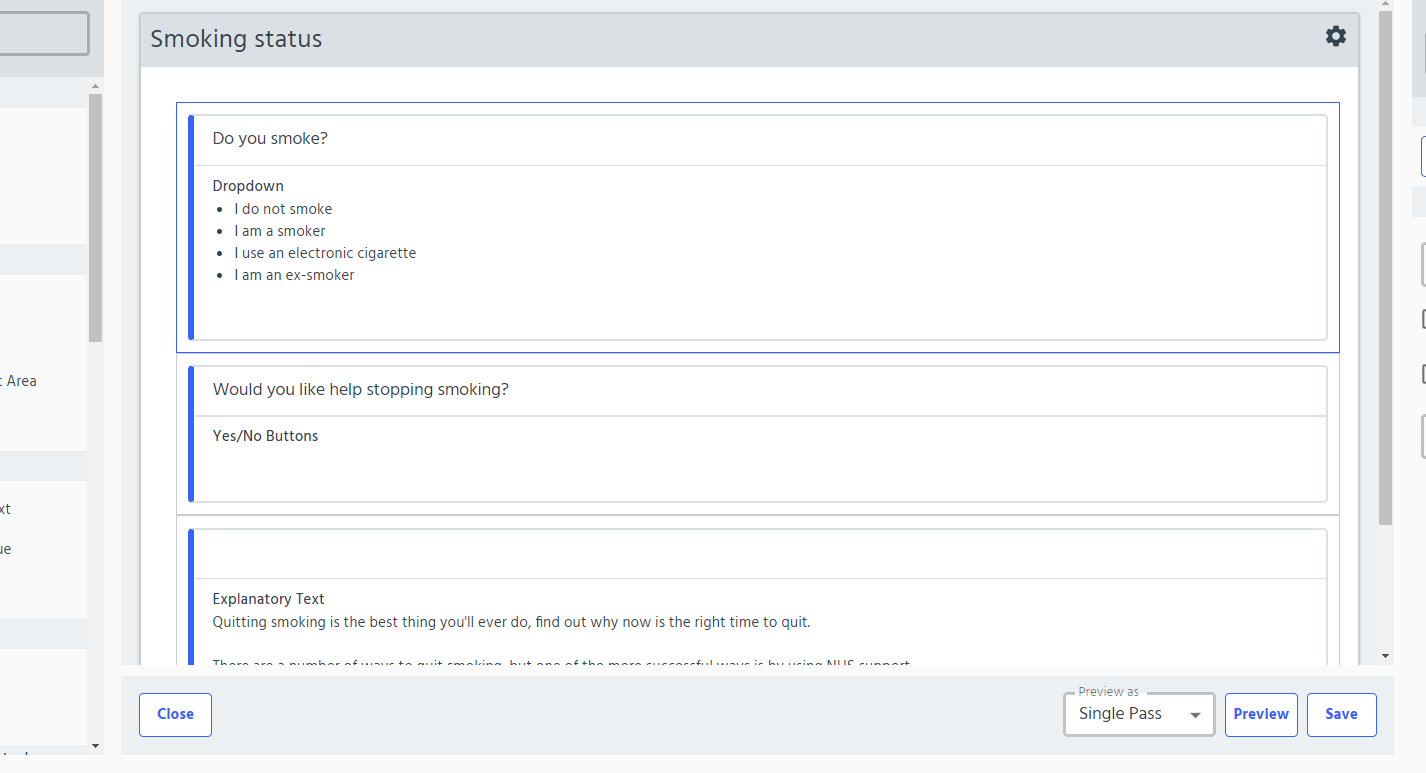
- Input and label the data fields as required. This example uses:
- Dropdown Menu
- Yes/No Answer
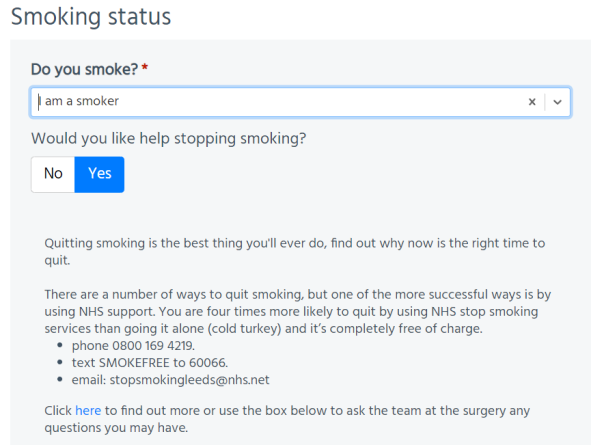
- Explanatory Text. The aim is to ask only smokers if they want help to stop smoking and if they answer ‘Yes’, to provide them with more information.
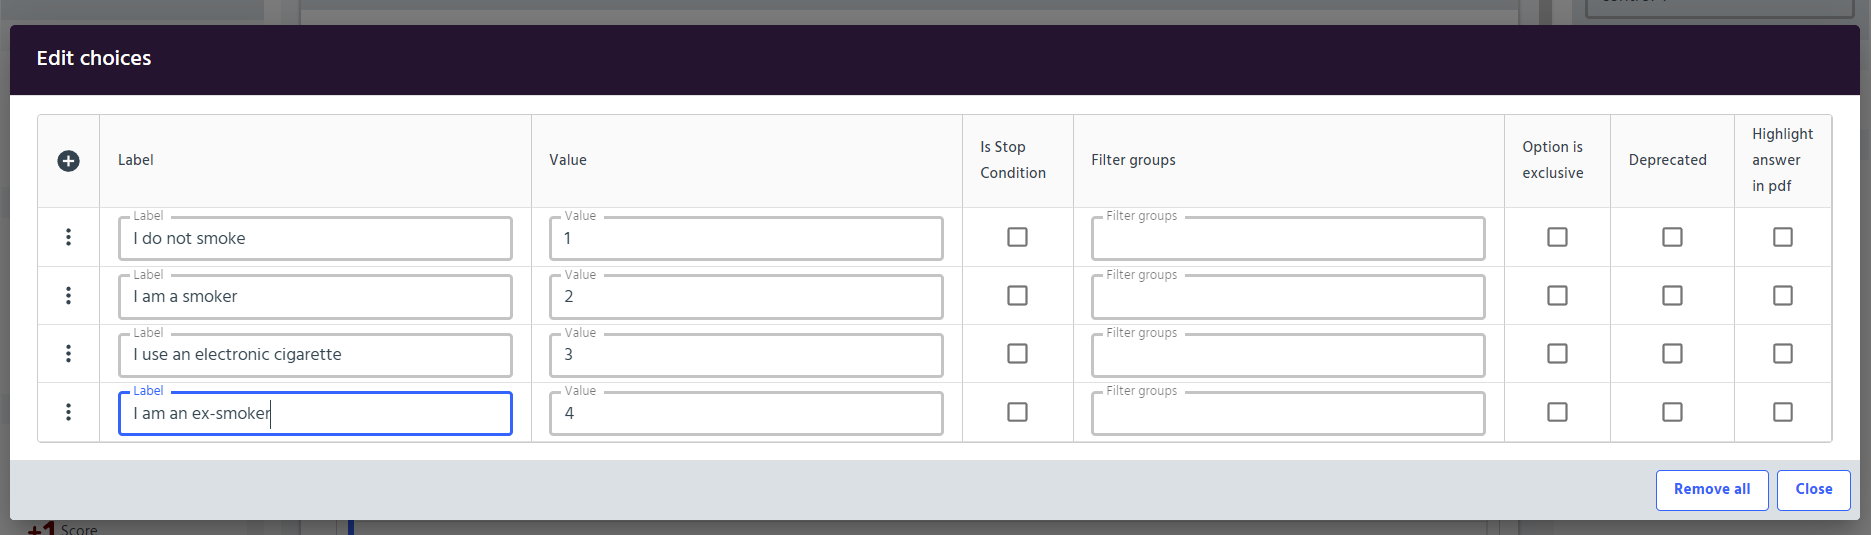
- Label any required choices. You can use numeric or string (text) values. For this example, we are using numeric values. Click Apply.
- Click the Control Settings (cog) icon at the side of the data field to access settings. Question 1. “Do you smoke?” should be set as a required field (i.e. it must be answered).
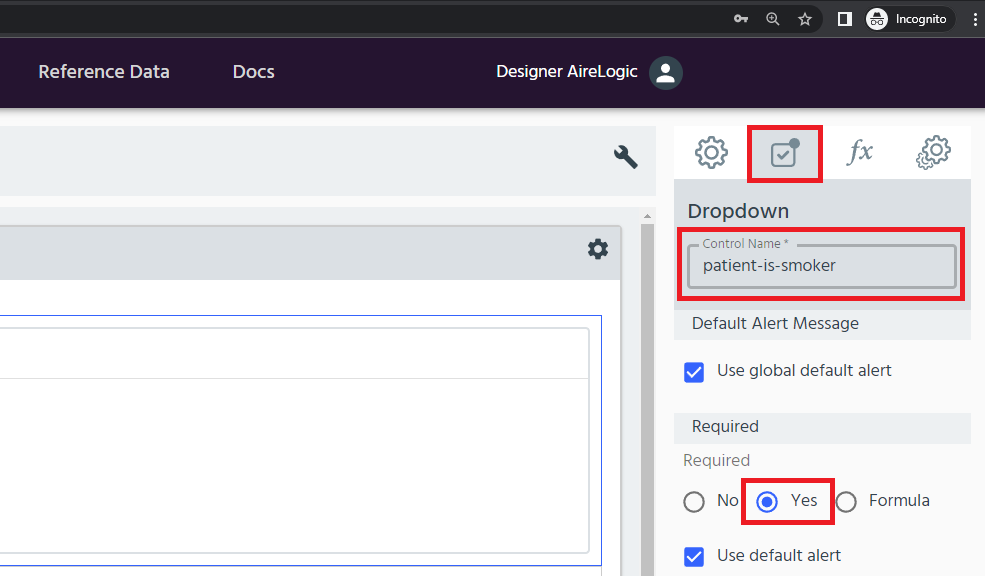
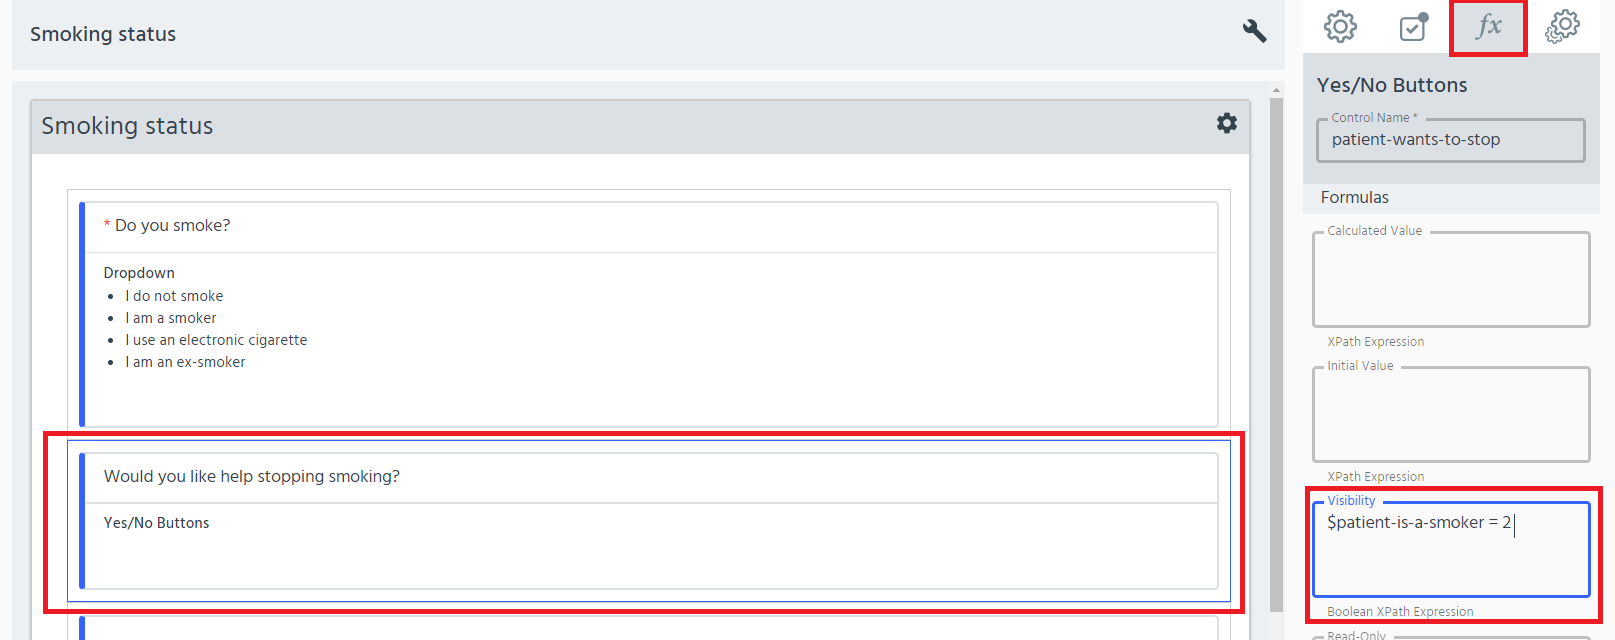
- Label the controls for the data fields that will be used to determine if - this will make inputting the XPath expression simpler.
- Next, go to the first data field that will be skipped (i.e. by those who are not smokers). Click the_Control Settings_ (cog) icon. In the Formulas tab input the X-Path into the Visibility text box in the format $control-name = true() As this is a select one from multiple data field, we can use the value that relates to being a smoker (2 = I am a smoker), as we want the next question to be visible only to smokers. The formula is: $patient-is-a-smoker = 2
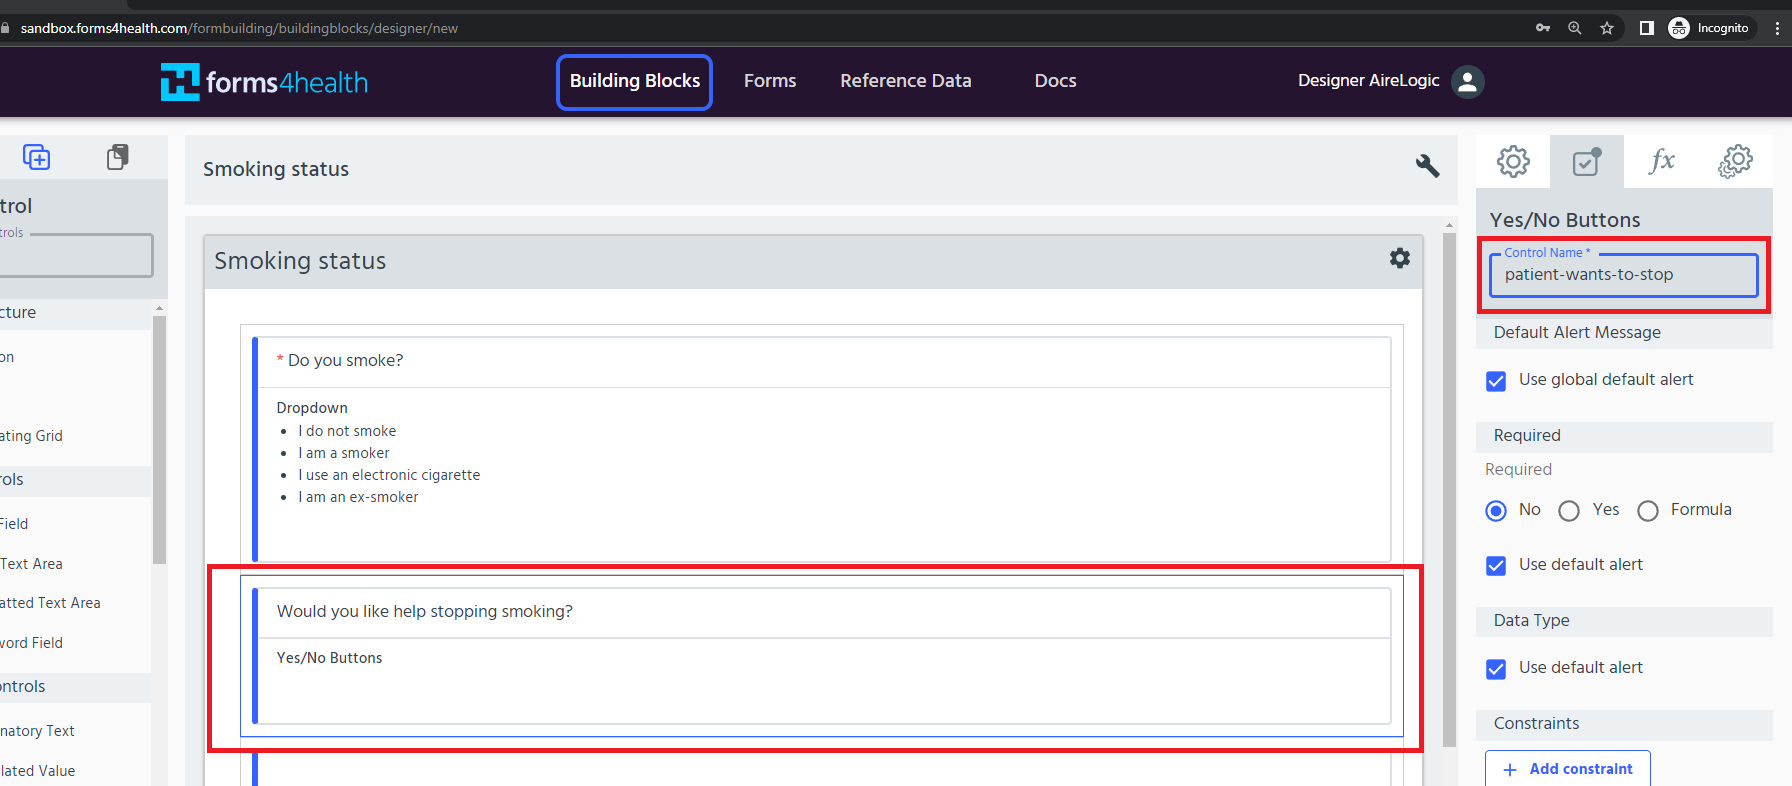
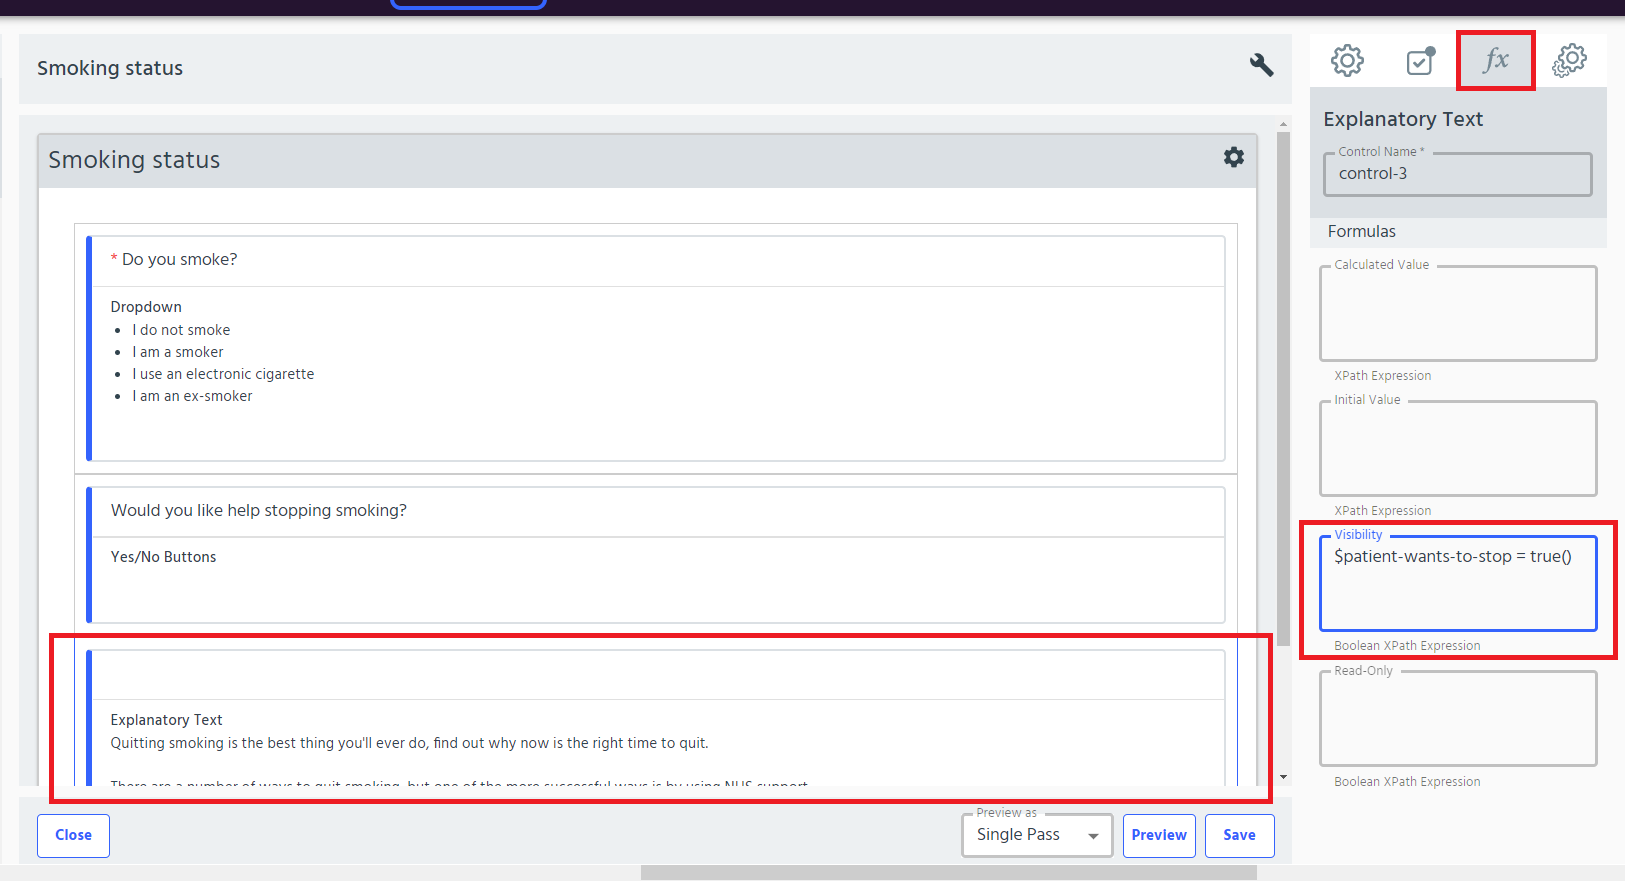
- The next data field - information about how to quit smoking - is a binary response option (Yes/No Answer). If the patient responds ‘Yes’, we want them to see Here we can use the formula: $patient-wants-to-stop = true()
- Preview and test the building block.
More on Skip Logic:
- To create skip logic for data fields with more than one relevant response options use the OR expression. Use of the expressions is dependent on how you have labelled the response options (numeric or string). For example:
- $patient-is-a-smoker = 2 or $patient-is-a-smoker = 3
- $patient-is-a-smoker = i-am-a-smoker or $patient-is-a-smoker = i-use-electronic-cigarettes
- For more complex XPath expressions, see the quick reference list in the FAQ guide.
Filtering Drop Downs
Values in one drop down can be used to filter the values in another dropdown.
- Create the first drop down and add some values to it
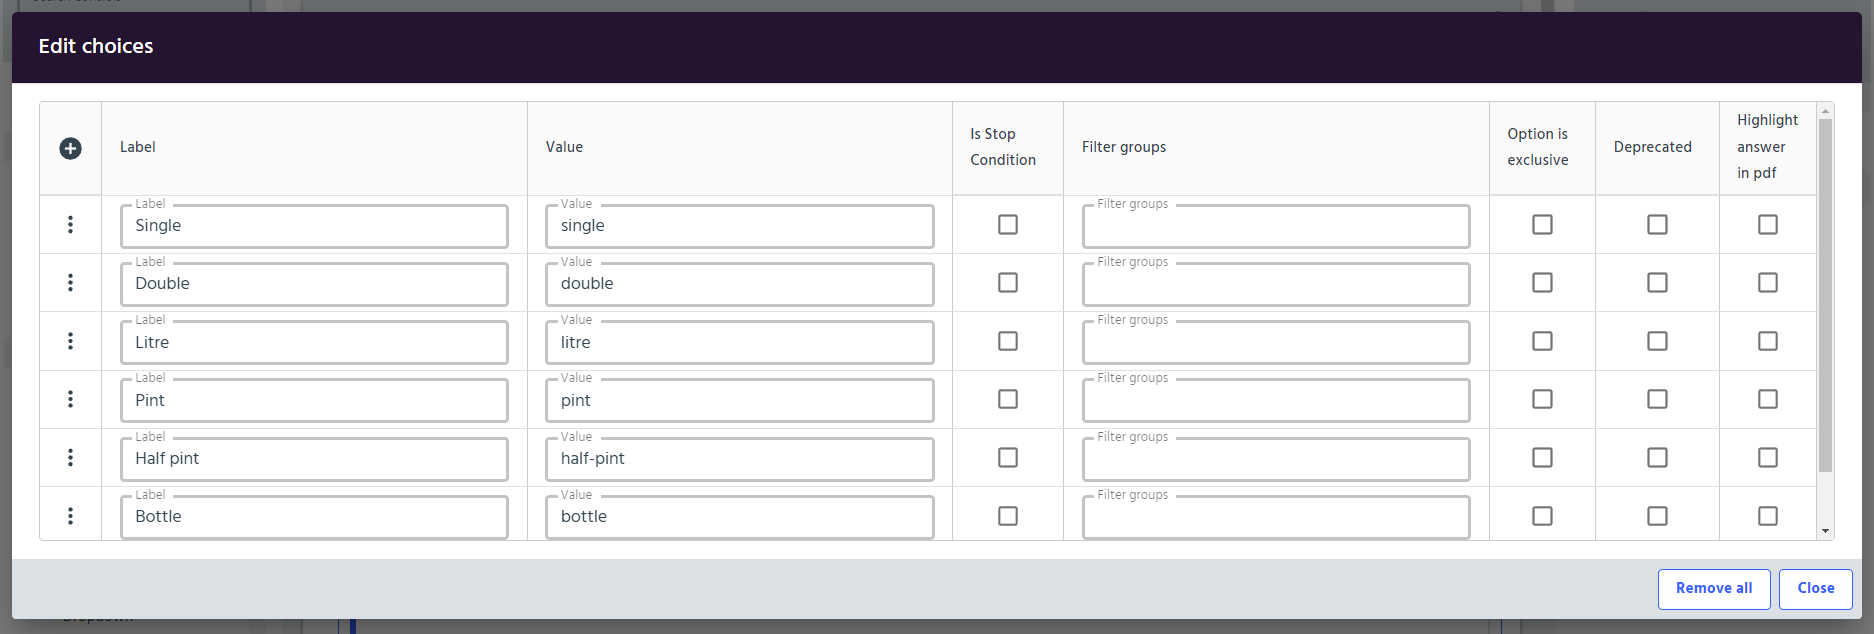
- Give the dropdown a name
- Create a second dropdown and add values to it. In the filter groups column add a value from the first dropdown to have this list filtered when the first dropdown is set to that value. Multiple values can be entered separated by a space.
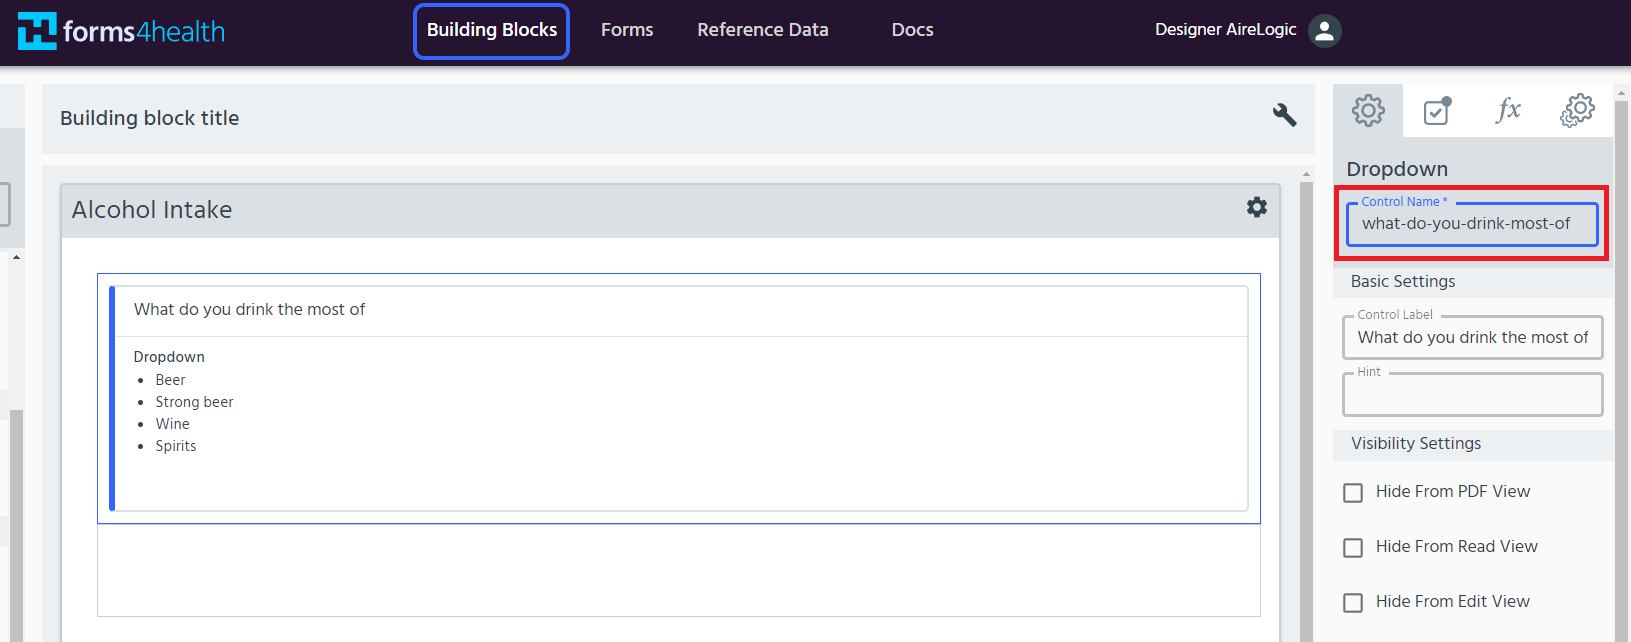
- On the second dropdown under additional settings set the choice filter xpath to the name of the first dropdown.
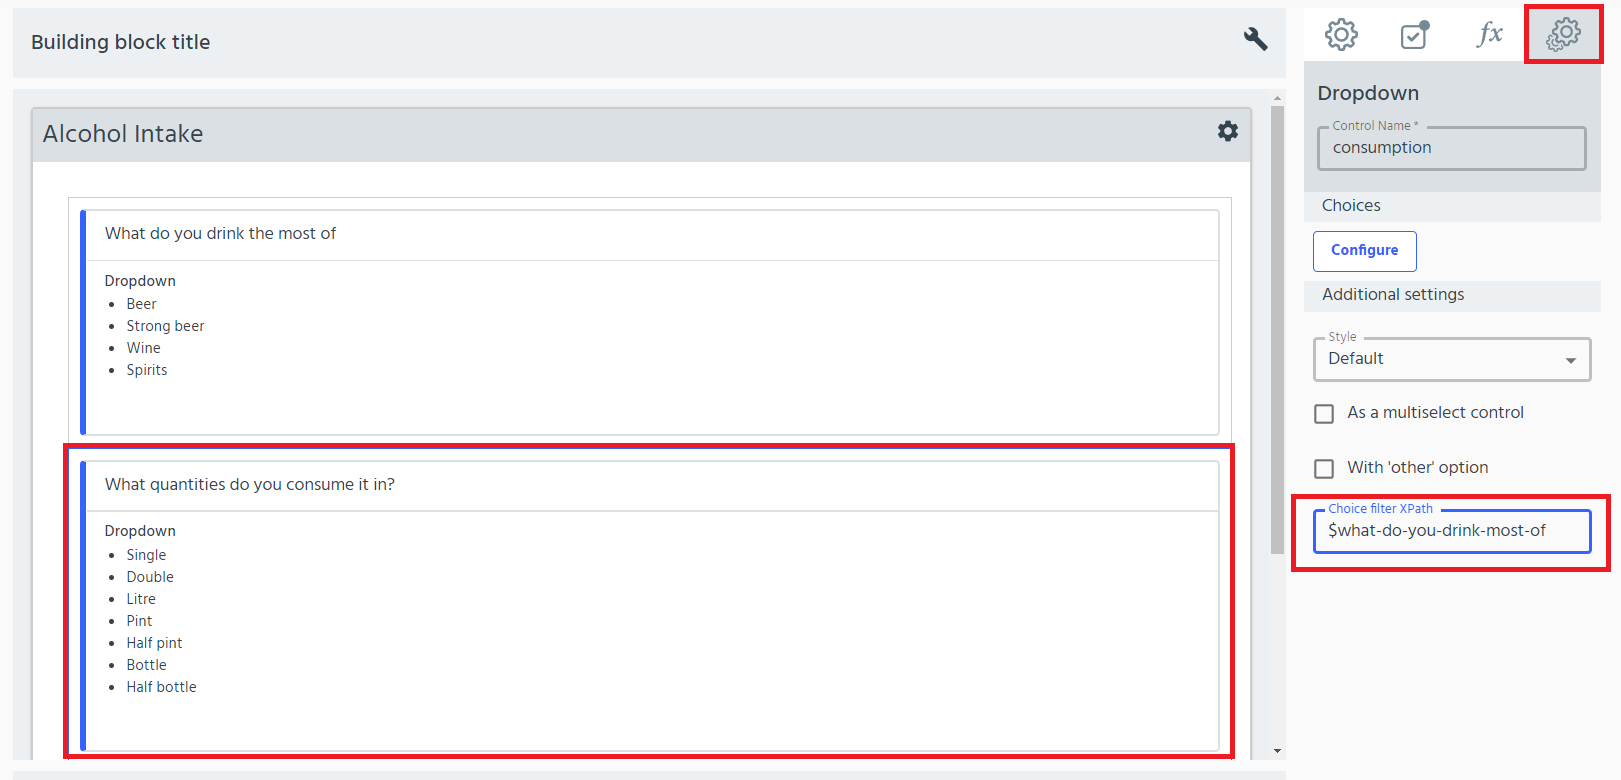
- Preview the form and you can see that changing the first dropdown filters the results of the second dropdown ($what-do-you-drink-most-of)
Evaluating Checkboxes
When using checkboxes often more than one answer will be provided meaning we need to use an XPath query to work out which options have been selected.
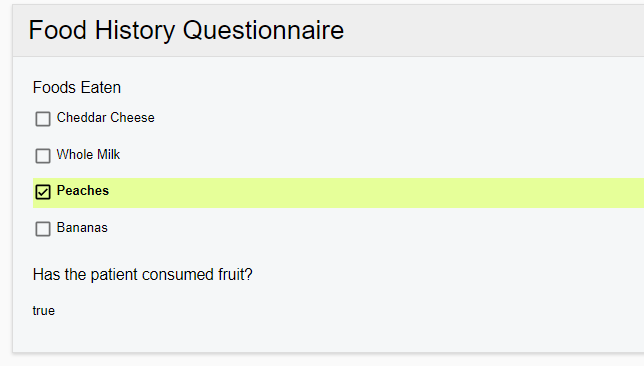
- Add a checkbox control with more than one option and a calculated value. In this example we have a selection of foods and a calculated value that determines if the selected foods contain fruits.

- In order to determine which checkbox values have been selected we can use the XPath function
contains, the first argument to the function is a text value we want to search and the second argument is the value we want to search for. On the formula tab of the calculated value control we can usecontainsandorto search for multiple values, if the value we are searching for is found then the contains function returns true.
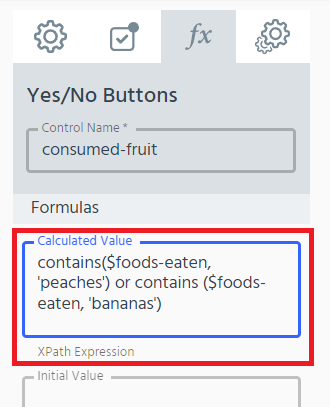
- When the user selects a value that matches one of those in our contains formula the calculated value changes to true.
Validation
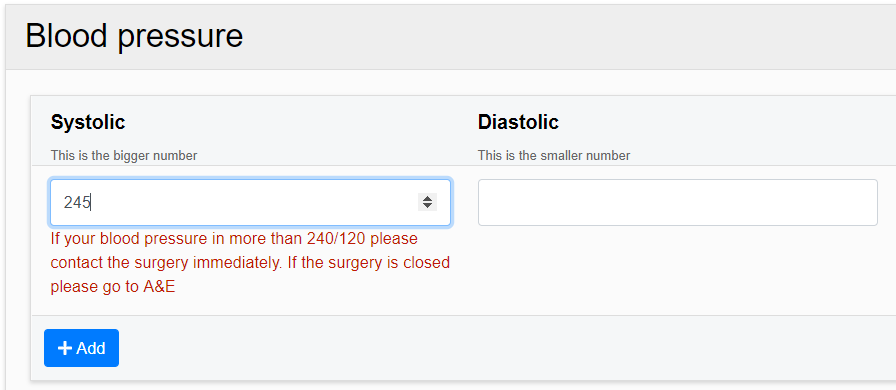
Use for: setting accepted parameters within a data field that constrain the values that users can input, by type (e.g. string, numeric etc.) and other criteria e.g length or value. These parameters mean that unacceptable values will be rejected and can be associated with error messages.
For example:
Validation using formulas
- Input the required data fields that will be constrained. In this example, these fields are height and weight.
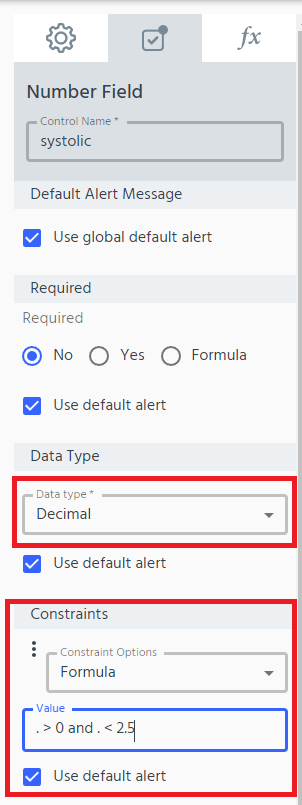
- Go to the Control Settings (cog) icon and the Validations and Alerts tab. In the second dropdown menu, ensure the correct Data Type is selected. In this case, the data type is ‘decimal’.
- In the third dropdown menu, Formula is selected as the default option. Input the required formula into the text box to the right. For this example, a height will be validated if it is greater than 0m (>0) and less than 2.5m (<2.5).
Find more information about common operators on the FAQ guide.
Note: For numeric values, the expression =’’ (left blank) can be used to ensure that when a formula is used to set the validation rules for a data field, the field can also be valid when blank (i.e. it is optional to complete). The =’’ expression OR =’string’ can be used for non-numeric values.
Other validation options
- Go to the Control Settings (cog) icon and the Validations and Alerts tab.In the third dropdown menu, there are a range of additional validation options:
- Positive
- Positive or Zero
- Negative
- Negative or Zero
- Use these options together with a relevant Data Type to create validation rules.
Visibility
Use for: configuring if and when a data field is visible to a form user. Visibility can be used to show information or data fields to form users, based on defined parameters.
In this example, the from user is shown a relevant message about BMI, based on the calculated BMI using a patient’s height and weight information.
For example:
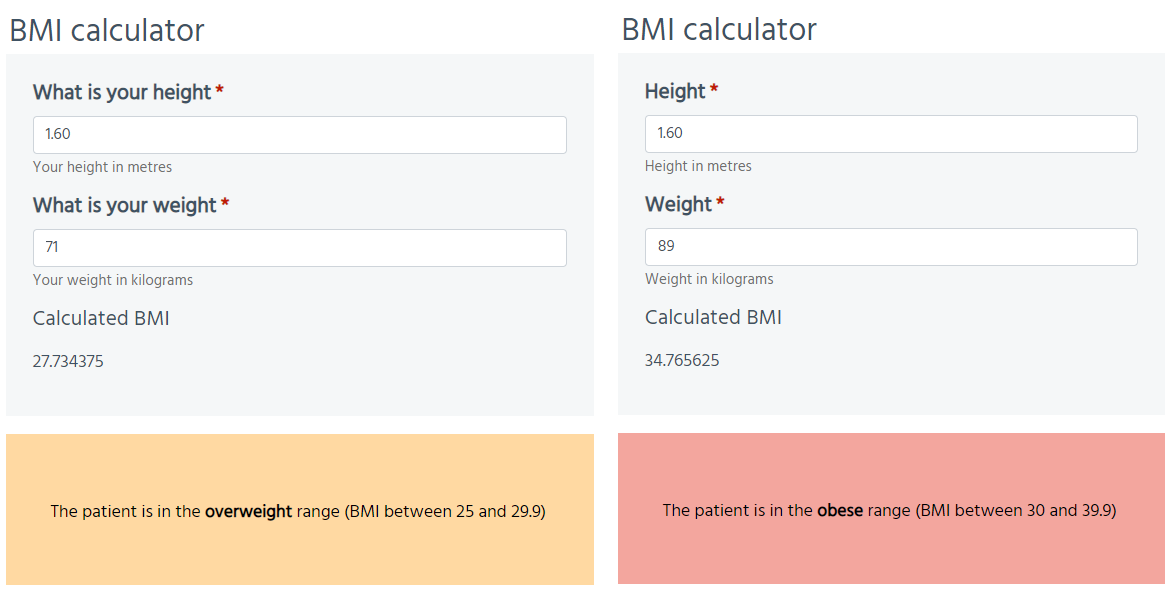
- Input the required data fields that will be used to set the parameters for visibility of the BMI explanatory information. In this example, these fields are: height, weight and calculated BMI. The information visbility will be based on the calculated BMI value. Use relevant value labels (e.g. calculated-bmi) to reference the relevant data fields (controls) and set parameters in formulas. Note: in this example, the calculated value field also has visibiility controls applied. This creates a hierarchy within the building blocK so that height and weight have to be input to produce calculated value. The visibility of any later data fields that rely on the calculated value will have this reliance in addition to any defined controls.
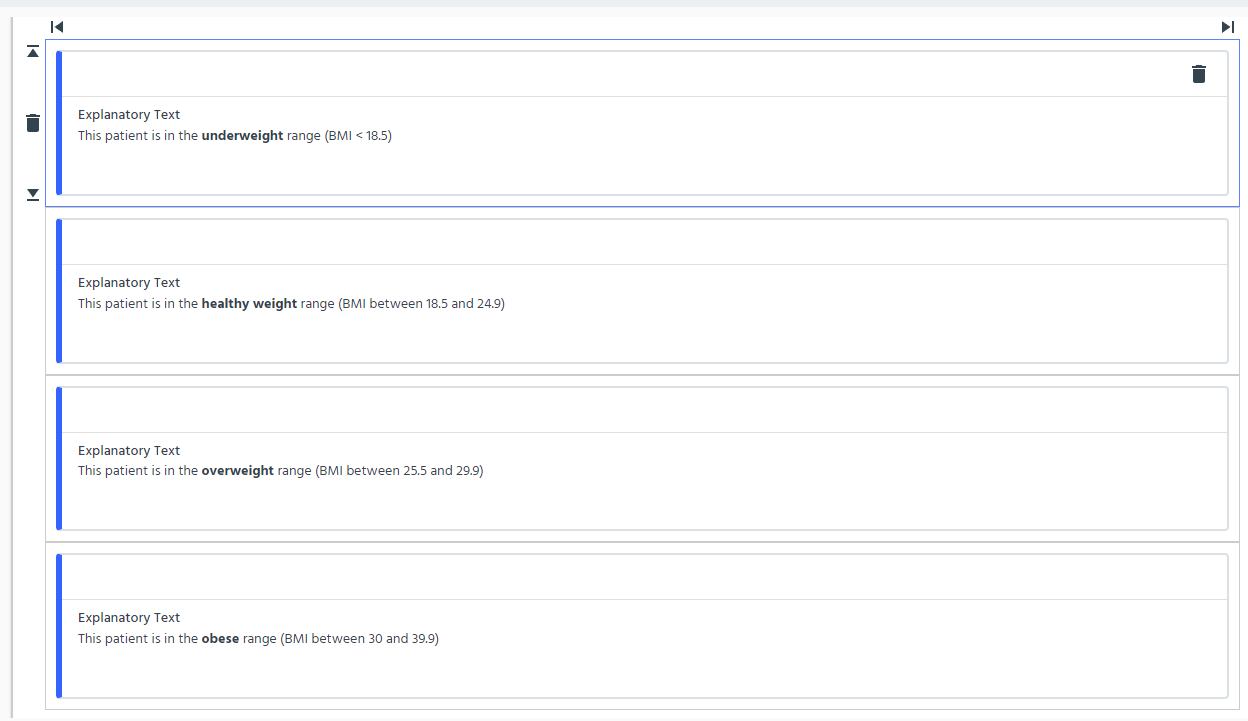
- Create an explanatory text data field for each of the BMI calculation explanations. These can be nested within separate sections if preferred, which will further emphasise the way the explanations are presented to users. Note: this example uses section highlighting. You can find out more in the highlighting explanation.
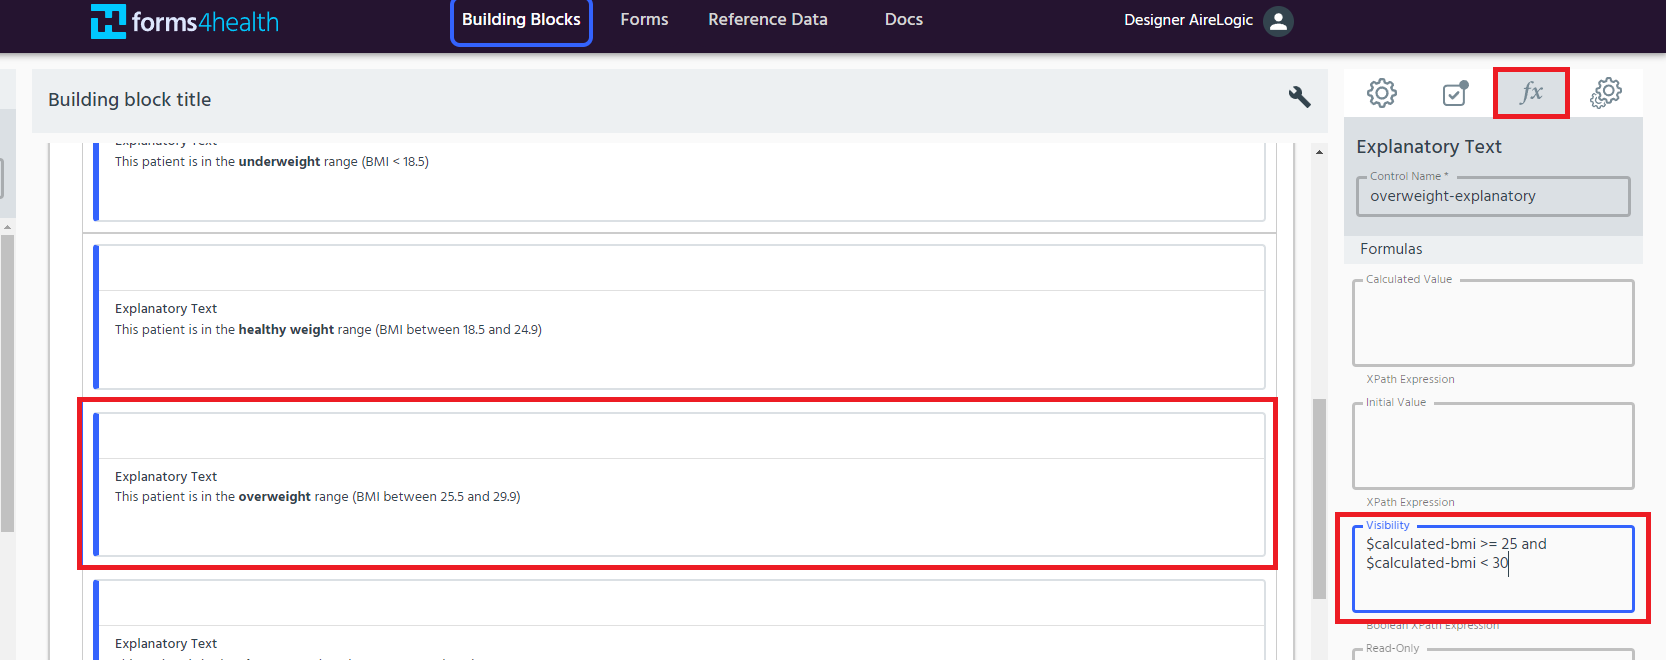
- Click the Control Settings (cog) icon for each explanatory text field and input the relevant parameters in the Visibility text box in the Formulas tab. Formulas take the form: $control-name operator. Operators can include >, <, >=, <= etc. See more in the FAQ guide.
In this example:
- The underweight BMI range is less than 18.5. So underweight explantory text visibility = $calculated-bmi < 18.5
- The healthy weight BMI range is between 18.5 and 24.9. So healthy weight explanatory text visibility = $calculated-bmi >= 18.5 and $calculated-bmi < 25
- The overweight BMI range is between 25 and 29.9. So overweight explanatory text visbility = $calculated-bmi >= 25 and $calculated-bmi < 30
- The obese BMI range is between 30 and 30.9. So obese explanatory text visibility = $calculated-bmi > 30
Note: if using the current control value as the parameter to set visibility, a full stop (.) can be used in place of the ‘$control-name’ format.
